
SpringBoot项目整合Netty
来源:互联网
时间:2026-08-07 07:33:56
Netty 是 JBoss 推出的一款 Java 开源框架,其核心定位是为网络应用提供异步的、事件驱动式的编程模型。简单来说,它是一套让开发者能够轻松构建高性能、高可靠性网络服务器和客户端的工具箱。作为基于 NIO 的编程框架,Netty 极大地简化和流线化了网络应用的开发流程,无论是基于 TCP 还是 UDP 的 Socket 服务,亦或是实现 FTP、SMTP、HTTP 等复杂二进制文本协议的应用,都能通过它快速落地。值得注意的是,“快速”与“简单”在 Netty 的设计哲学中并未以牺牲性能为代价。经过精心的架构设计,Netty 成功地在开发效率与应用性能、稳定性及伸缩性之间找到了完美的平衡点。
本文将带领大家学习如何在SpringBoot项目中集成Netty
一、Netty服务端
由于是SpringBoot项目,因此这里不展示SpringBoot相关的依赖
1、导入依赖
org.projectlombok lombok io.netty netty-all 4.1.36.Final 2、编写netty处理器
/** * Socket拦截器,用于处理客户端的行为 * * @author Gjing **/@Slf4jpublic class SocketHandler extends ChannelInboundHandlerAdapter {public static final ChannelGroup clients = new DefaultChannelGroup(GlobalEventExecutor.INSTANCE);/** * 读取到客户端发来的消息 * * @param ctx ChannelHandlerContext * @param msg msg * @throws Exception e */@Overridepublic void channelRead(ChannelHandlerContext ctx, Object msg) throws Exception {// 由于我们配置的是 字节数组 编解码器,所以这里取到的用户发来的数据是 byte数组byte[] data = (byte[]) msg;log.info("收到消息: " new String(data));// 给其他人转发消息for (Channel client : clients) {if (!client.equals(ctx.channel())) {client.writeAndFlush(data);}}}@Overridepublic void handlerAdded(ChannelHandlerContext ctx) throws Exception {log.info("新的客户端链接:" ctx.channel().id().asShortText());clients.add(ctx.channel());}@Overridepublic void handlerRemoved(ChannelHandlerContext ctx) throws Exception {clients.remove(ctx.channel());}@Overridepublic void exceptionCaught(ChannelHandlerContext ctx, Throwable cause) throws Exception {cause.printStackTrace();ctx.channel().close();clients.remove(ctx.channel());}}3、编写netty初始化器
/** * Socket 初始化器,每一个Channel进来都会调用这里的 InitChannel 方法 * @author Gjing **/@Componentpublic class SocketInitializer extends ChannelInitializer {@Overrideprotected void initChannel(SocketChannel socketChannel) throws Exception {ChannelPipeline pipeline = socketChannel.pipeline();// 添加对byte数组的编解码,netty提供了很多编解码器,你们可以根据需要选择pipeline.addLast(new ByteArrayDecoder());pipeline.addLast(new ByteArrayEncoder());// 添加上自己的处理器pipeline.addLast(new SocketHandler());}} 4、编写netty服务
/** * @author Gjing **/@Slf4j@Componentpublic class SocketServer {@Resourceprivate SocketInitializer socketInitializer;@Getterprivate ServerBootstrap serverBootstrap;/** * netty服务监听端口 */@Value("${netty.port:8088}")private int port;/** * 主线程组数量 */@Value("${netty.bossThread:1}")private int bossThread;/** * 启动netty服务器 */public void start() {this.init();this.serverBootstrap.bind(this.port);log.info("Netty started on port: {} (TCP) with boss thread {}", this.port, this.bossThread);}/** * 初始化netty配置 */private void init() {// 创建两个线程组,bossGroup为接收请求的线程组,一般1-2个就行NioEventLoopGroup bossGroup = new NioEventLoopGroup(this.bossThread);// 实际工作的线程组NioEventLoopGroup workerGroup = new NioEventLoopGroup();this.serverBootstrap = new ServerBootstrap();this.serverBootstrap.group(bossGroup, workerGroup) // 两个线程组加入进来.channel(NioServerSocketChannel.class)// 配置为nio类型.childHandler(this.socketInitializer); // 加入自己的初始化器}}5、启动netty
由于使用SpringBoot,因此我们可以监听项目启动成功后触发启动Netty服务器,这时候只要SpringBoot启动就行了
/** * 监听Spring容器启动完成,完成后启动Netty服务器 * @author Gjing **/@Componentpublic class NettyStartListener implements ApplicationRunner {@Resourceprivate SocketServer socketServer;@Overridepublic void run(ApplicationArguments args) throws Exception {this.socketServer.start();}}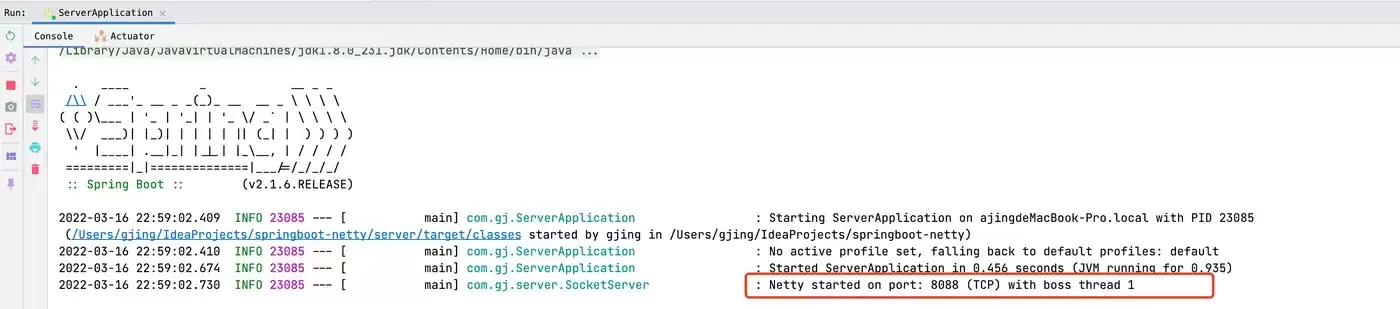
二、Netty客户端
客户端这里以NIO来编写,就不写Netty了,在实际工作中,其实也都是Netty服务端,客户端可能是 WebSocket 或者 Socket,我们这里就以 Socket 为例,由于 NIO 是Java提供的,所以我们不需要引入什么依赖
1、编写客户端线程
因为我们不能阻塞 主线程,因此需要开启子线程来作为客户端
/** * @author Gjing **/public class ClientThread implements Runnable{private final Selector selector;public ClientThread(Selector selector) {this.selector = selector;}@Overridepublic void run() {try {for (; ; ) {int channels = selector.select();if (channels == 0) {continue;}Set selectionKeySet = selector.selectedKeys();Iterator keyIterator = selectionKeySet.iterator();while (keyIterator.hasNext()) {SelectionKey selectionKey = keyIterator.next();// 移除集合当前得selectionKey,避免重复处理keyIterator.remove();if (selectionKey.isReadable()) {this.handleRead(selector, selectionKey);}}}} catch (IOException e) {e.printStackTrace();}}// 处理可读状态private void handleRead(Selector selector, SelectionKey selectionKey) throws IOException {SocketChannel channel = (SocketChannel) selectionKey.channel();ByteBuffer byteBuffer = ByteBuffer.allocate(1024);StringBuilder message = new StringBuilder();if (channel.read(byteBuffer) > 0) {byteBuffer.flip();message.append(StandardCharsets.UTF_8.decode(byteBuffer));}// 再次注册到选择器上,继续监听可读状态channel.register(selector, SelectionKey.OP_READ);System.out.println(message);}} 2、客户端逻辑
/** * 聊天客户端 * * @author Gjing **/public class ChatClient {public void start(String name) throws IOException {SocketChannel socketChannel = SocketChannel.open(new InetSocketAddress("127.0.0.1", 8088));socketChannel.configureBlocking(false);Selector selector = Selector.open();socketChannel.register(selector, SelectionKey.OP_READ);// 监听服务端发来得消息new Thread(new ClientThread(selector)).start();// 监听用户输入Scanner scanner = new Scanner(System.in);while (scanner.hasNextLine()) {String message = scanner.nextLine();if (StringUtils.hasText(message)) {socketChannel.write(StandardCharsets.UTF_8.encode(name ": " message));}}}}3、客户端1
/** * @author Gjing **/public class Client1 {public static void main(String[] args) throws IOException {new ChatClient().start("李四");}}4、客户端2
/** * @author Gjing **/public class Client2 {public static void main(String[] args) throws IOException {new ChatClient().start("张三");}}5、启动这两个客户端
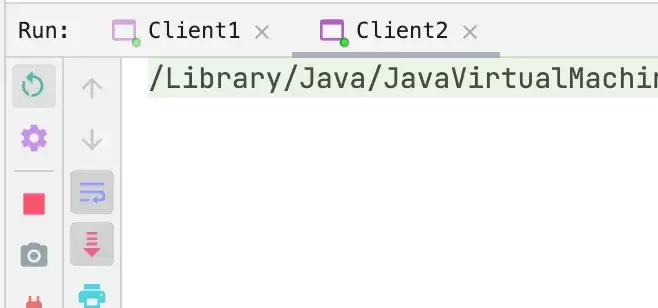
服务端也触发了日志打印,监听到客户端加入

rip|imageView2/2/w/1240)
现在我们通过客户端2,发一条消息看看
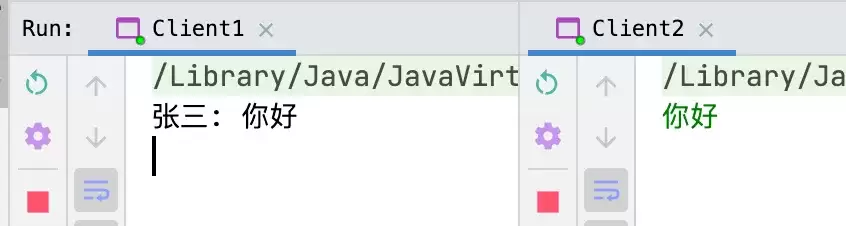
客户端1 成功收到了 客户端2的消息,同理我们通过客户端1 发送

服务端也输出了消息日志

文章到此结束啦,这就是一个普通的小案例哦,更多知识大家可以通过官网进行学习,Demo源代码地址:SpringBoot-Netty


