
【Qwen2 微调之旅】Lora 对 Qwen2-7B-Instruct 的微调实战手册
大型预训练语言模型固然强大,但要在特定任务上真正落地,往往需要投入惊人的算力和数据成本。拿Qwen2-7B-Instruct这种70亿参数的“大家伙”来说,如果想针对某个垂直场景做全参数微调,先不说时间,光是显存要求就能让不少团队望而却步。那有没有更聪明的办法呢?Lora微调正是为解决这一痛点而生——通过引入低秩矩阵结构,大幅减少需要更新的参数数量,同时保持甚至提升模型在目标任务上的表现。今天这篇文章,咱们就以Qwen2-7B-Instruct为例,一步步拆解Lora微调的实战流程,希望能给正在做模型定制化的小伙伴们提供一个可复用的参考方案。
一、Lora简介
1. Lora微调技术概述
Lora微调本质是一种基于低秩矩阵的轻量化微调方法。它不去动整个权重矩阵,而是在其中插入两个较小的矩阵(低秩分解),从而用极少的额外参数来模拟全参数微调的效果。这样一来,模型的存储和计算需求都显著降低,但性能几乎不打折扣——这也是它这两年迅速成为“高效微调”代名词的原因。
2. Qwen2-7B-Instruct模型简介
Qwen2-7B-Instruct是阿里通义千问系列中针对指令理解与生成优化的版本。70亿参数让它能胜任文本摘要、情感分析、机器翻译等多数NLP任务,特别是在遵循复杂指令方面表现亮眼。不过越是强大的模型,微调起来门槛越高,而Lora恰好能帮我们把这个门槛降下来。
3. Lora微调的优势
- 参数减少:通过低秩分解,参数量可以缩减到原来的千分之一甚至更低。
- 计算效率:训练和推理时内存占用大幅下降,消费级显卡也能跑。
- 灵活性:同一基座模型可以挂多个不同的Lora适配器,针对不同场景快速切换。
二、技术
1. Lora微调的工作原理
原理其实不复杂:对原始权重矩阵W,我们不去更新W本身,而是训练两个低秩矩阵A和B,使得最终的更新量ΔW = BA。训练时只更新A和B,推理时再将BA合并回W中。这样既保留了原始模型的知识,又用极小的代价让模型学会了新任务。
2. Lora微调在Qwen2-7B-Instruct中的应用
在Qwen2-7B-Instruct上应用Lora,核心是选定需要插入低秩矩阵的目标模块——通常集中在注意力层(q_proj, k_proj, v_proj, o_proj)和前馈网络层(gate_proj, up_proj, down_proj)。通过调整秩r和缩放系数lora_alpha,可以控制微调的强度与泛化能力。实际测试下来,即使秩设置为8,指令类任务的准确性也能得到明显提升。
三、应用场景
1. 问答系统
Lora微调后的Qwen2-7B-Instruct可以用于构建更智能的问答系统,对领域问题的回答准确率有明显改善。
2. 自动摘要生成
在自动摘要任务中,微调后的模型能更精准地抓住原文关键信息,输出简洁且不漏重点的摘要。
3. 指令执行
对于智能家居控制、代码生成等需要严格遵循指令的场景,微调后的模型对复杂指令的解析和执行能力更稳定。
四、代码实践
1. 环境准备
先把环境搭好。以下是我本次用的配置:
- PyTorch: 2.1.0
- CUDA: 12.1
- GPU: RTX 4090D (24GB)
- Ubuntu 22.04.3 LTS
2. 安装依赖
安装相关的依赖包,建议用清华源加速:
python -m pip install --upgrade pip
pip config set global.index-url https://pypi.tuna.tsinghua.edu.cn/simple
pip install modelscope==1.9.5
pip install "transformers>=4.39.0"
pip install streamlit==1.24.0
pip install sentencepiece==0.1.99
pip install accelerate==0.27
pip install transformers_stream_generator==0.0.4
pip install datasets==2.18.0
pip install peft==0.10.0
# 可选(安装flash-attn能加速,但依赖CUDA版本)
MAX_JOBS=8 pip install flash-attn --no-build-isolation
3. 模型下载
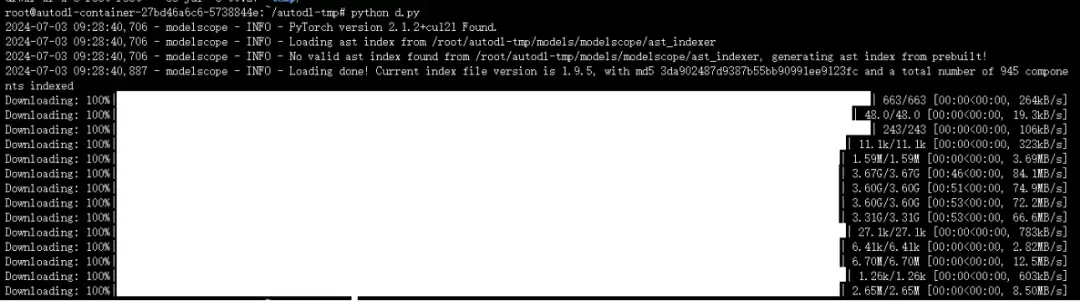
使用modelscope下载Qwen2-7B-Instruct,模型约15GB,网络好的话5分钟左右就能拉下来。在 /root/autodl-tmp 下创建 d.py,内容如下,然后执行 python /root/autodl-tmp/d.py:
import torch
from modelscope import snapshot_download, AutoModel, AutoTokenizer
import os
model_dir = snapshot_download('qwen/Qwen2-7B-Instruct', cache_dir='/root/autodl-tmp', revision='master')
下载成功截图如下:
4. 导入依赖包
from datasets import Dataset
import pandas as pd
from transformers import AutoTokenizer, AutoModelForCausalLM, DataCollatorForSeq2Seq, TrainingArguments, Trainer, GenerationConfig
5. 数据集准备
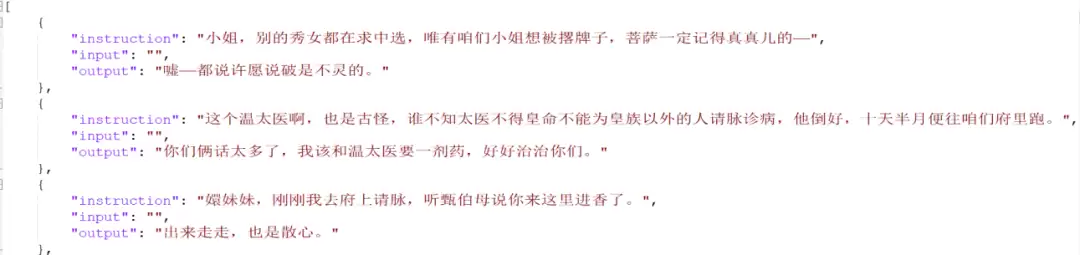
LLM微调通常采用指令微调的形式,每条数据由instruction(指令)、input(输入)和output(期望输出)三部分组成。核心目标是让模型学会理解并遵循指令。下面是一个对话指令集的示例(内容改编自甄嬛传语料):
6. 数据加载查看
# 将JSON文件转换为CSV文件
df = pd.read_json('../dataset/huanhuan.json')
ds = Dataset.from_pandas(df)
查看前5条:
ds[:5]
输出:
{'instruction': ['小姐,别的秀女都在求中选,唯有咱们小姐想被撂牌子,菩萨一定记得真真儿的——', ...],
 'input': ['', '', '', '', ''],
 'output': ['嘘——都说许愿说破是不灵的。', ...]}
7. 加载分词器模型
加载本地下载好的Qwen2-7B-Instruct分词器:
tokenizer = AutoTokenizer.from_pretrained('/root/autodl-tmp/qwen/Qwen2-7B-Instruct', use_fast=False, trust_remote_code=True)
tokenizer

8. 数据格式化处理
Lora训练需要将文本编码为input_ids和labels。我们先定义一个预处理函数process_func:
1)定义处理函数
def process_func(example):
    MAX_LENGTH = 384
    input_ids, attention_mask, labels = [], [], []
    instruction = tokenizer(f"<|im_start|>system\n现在你要扮演皇帝身边的女人--甄嬛<|im_end|>\n<|im_start|>user\n{example['instruction'] + example['input']}<|im_end|>\n<|im_start|>assistant\n", add_special_tokens=False)
    response = tokenizer(f"{example['output']}", add_special_tokens=False)
    input_ids = instruction["input_ids"] + response["input_ids"] + [tokenizer.pad_token_id]
    attention_mask = instruction["attention_mask"] + response["attention_mask"] + [1]
    labels = [-100] * len(instruction["input_ids"]) + response["input_ids"] + [tokenizer.pad_token_id]
    if len(input_ids) > MAX_LENGTH:
        input_ids = input_ids[:MAX_LENGTH]
        attention_mask = attention_mask[:MAX_LENGTH]
        labels = labels[:MAX_LENGTH]
    return {"input_ids": input_ids, "attention_mask": attention_mask, "labels": labels}
补充说明
<|im_start|>system
You are a helpful assistant.<|im_end|>
<|im_start|>user
你是谁?<|im_end|>
<|im_start|>assistant
我是一个有用的助手。<|im_end|>
2)数据集处理
tokenized_id = ds.map(process_func, remove_columns=ds.column_names)
tokenized_id
输出:
Dataset({features: ['input_ids', 'attention_mask', 'labels'], num_rows: 3729})
3)查看input_ids格式
tokenizer.decode(tokenized_id[0]['input_ids'])
输出:
'<|im_start|>system\n现在你要扮演皇帝身边的女人--甄嬛<|im_end|>\n<|im_start|>user\n小姐,别的秀女都在求中选,唯有咱们小姐想被撂牌子,菩萨一定记得真真儿的——<|im_end|>\n<|im_start|>assistant\n嘘——都说许愿说破是不灵的。<|endoftext|>'
4)labels查看
tokenizer.decode(list(filter(lambda x: x != -100, tokenized_id[1]["labels"])))
输出:
'你们俩话太多了,我该和温太医要一剂药,好好治治你们。<|endoftext|>'
9. 加载模型
import torch
model = AutoModelForCausalLM.from_pretrained('/root/autodl-tmp/qwen/Qwen2-7B-Instruct', device_map="auto", torch_dtype=torch.bfloat16)
model
模型结构信息:
Loading checkpoint shards: 0%|| 0/4 [00:00开启梯度检查点并查看精度:
model.enable_input_require_grads()
model.dtype
输出:torch.bfloat16
10. Lora配置
使用peft库的LoraConfig设置微调参数,关键项说明:
- task_type:模型类型,因果语言模型设为CAUSAL_LM
- target_modules:指定要插入Lora的模块,通常是attention和FFN的线性层
- r:低秩矩阵的秩,这里设为8
- lora_alpha:缩放系数,最终缩放倍数为lora_alpha/r(本例为32/8=4)
- lora_dropout:防止过拟合
from peft import LoraConfig, TaskType, get_peft_model
config = LoraConfig(
    task_type=TaskType.CAUSAL_LM,
    target_modules=["q_proj", "k_proj", "v_proj", "o_proj", "gate_proj", "up_proj", "down_proj"],
    inference_mode=False,
    r=8,
    lora_alpha=32,
    lora_dropout=0.1
)
config
输出配置详情(略)。然后加载到模型上:
model = get_peft_model(model, config)
查看可训练参数:
model.print_trainable_parameters()

11. 配置训练参数
通过TrainingArguments设置训练策略。常用参数:
- output_dir:模型输出目录
- per_device_train_batch_size:每张卡的batch size
- gradient_accumulation_steps:梯度累积步数,显存不够时可以增大这个值
- logging_steps:多少步输出一次日志
- num_train_epochs:训练轮数
- gradient_checkpointing:开启梯度检查点以节省显存(需配合model.enable_input_require_grads())
args = TrainingArguments(
    output_dir="./output/Qwen2_7B_instruct_lora",
    per_device_train_batch_size=4,
    gradient_accumulation_steps=4,
    logging_steps=10,
    num_train_epochs=3,
    sa ve_steps=10,
    learning_rate=1e-4,
    sa ve_on_each_node=True,
    gradient_checkpointing=True
)
12. 模型训练
trainer = Trainer(
    model=model,
    args=args,
    train_dataset=tokenized_id,
    data_collator=DataCollatorForSeq2Seq(tokenizer=tokenizer, padding=True),
)
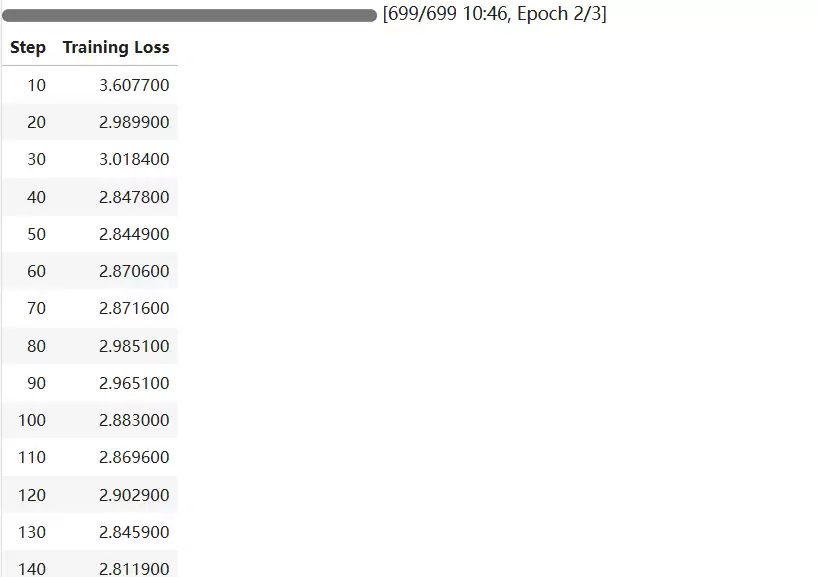
trainer.train()
训练过程截图:
13. 模型合并
将训练好的Lora权重合并回原模型,得到完整的微调版模型:
from transformers import AutoModelForCausalLM, AutoTokenizer
import torch
from peft import PeftModel

mode_path = '/root/autodl-tmp/qwen/Qwen2-7B-Instruct/'
lora_path = './output/Qwen2_instruct_lora/checkpoint-10'  # 改为你的实际checkpoint路径

tokenizer = AutoTokenizer.from_pretrained(mode_path, trust_remote_code=True)
model = AutoModelForCausalLM.from_pretrained(mode_path, device_map="auto", torch_dtype=torch.bfloat16, trust_remote_code=True).eval()
model = PeftModel.from_pretrained(model, model_id=lora_path)
14. 模型推理
用合并后的模型进行对话测试:
prompt = "你是谁?"
messages = [
    {"role": "user", "content": "假设你是皇帝身边的女人--甄嬛。"},
    {"role": "user", "content": prompt}
]
inputs = tokenizer.apply_chat_template(messages, add_generation_prompt=True, tokenize=True, return_tensors="pt", return_dict=True).to('cuda')
gen_kwargs = {"max_length": 2500, "do_sample": True, "top_k": 1}
with torch.no_grad():
    outputs = model.generate(**inputs, **gen_kwargs)
    outputs = outputs[:, inputs['input_ids'].shape[1]:]
    print(tokenizer.decode(outputs[0], skip_special_tokens=True))
输出示例:
我是甄嬛,家父是大理寺少卿甄远道。
结语
Lora微调确实为大模型的定制化提供了一条捷径。通过本文的实战步骤,大家应该能直观感受到:不需要动辄几十G的显存,也不用漫长的训练周期,就能让一个通用大模型在特定场景下“一呼百应”。随着Lora及其变体(如QLora、DoRA等)的不断成熟,模型高效适配的门槛还在降低。希望这篇文章能帮你快速上手,在实际项目中省下不少成本和时间。